What is Pi-hole and why run it on Windows?
Pi-hole is hands-down, the best ad blocker available.
That’s because it acts as a network wide ad-blocker. This means it blocks ads on every single device on your network without any browser extensions clogging up your browser. It even blocks ads inside apps.
What’s more, unlike browser based ad-blockers which just prevent ads from being displayed in your browser, Pi-hole speeds up your browsing experience as it blocks ads from being downloaded in the first place. If that wasn’t enough, it even prevents those annoying “it looks like you’re using an ad-blocker” pop-ups.
All of these benefits did come with one major drawback though. It was originally designed to run on Raspberry Pis. So, unless you had a Raspberry Pi, or a computer running Linux, you were out of luck. However, it’s now available for Docker. This means it can be installed on any device which will run Docker, such as Windows PCs or Macs.
I recently set up Pi-hole on my home network on a Windows PC and so far it’s worked flawlessly.
Anyway, here’s a step by step guide to block ads on all of our devices by installing Pi-hole on Windows 10.
What you’ll need
A Windows 10 PC (Pro or Enterprise edition) which you’re happy to leave on all of the time. Preferably a power efficient, quiet PC. In my case I’m using an Intel NUC.
If you have a Mac, you can also install Pi-hole on MacOS using a similar process to the one described below.
Step by step instructions
Step 1 - Download Docker
Download Docker for Windows. As part of this, you will need to create a Docker account.
Step 2 - Install Docker
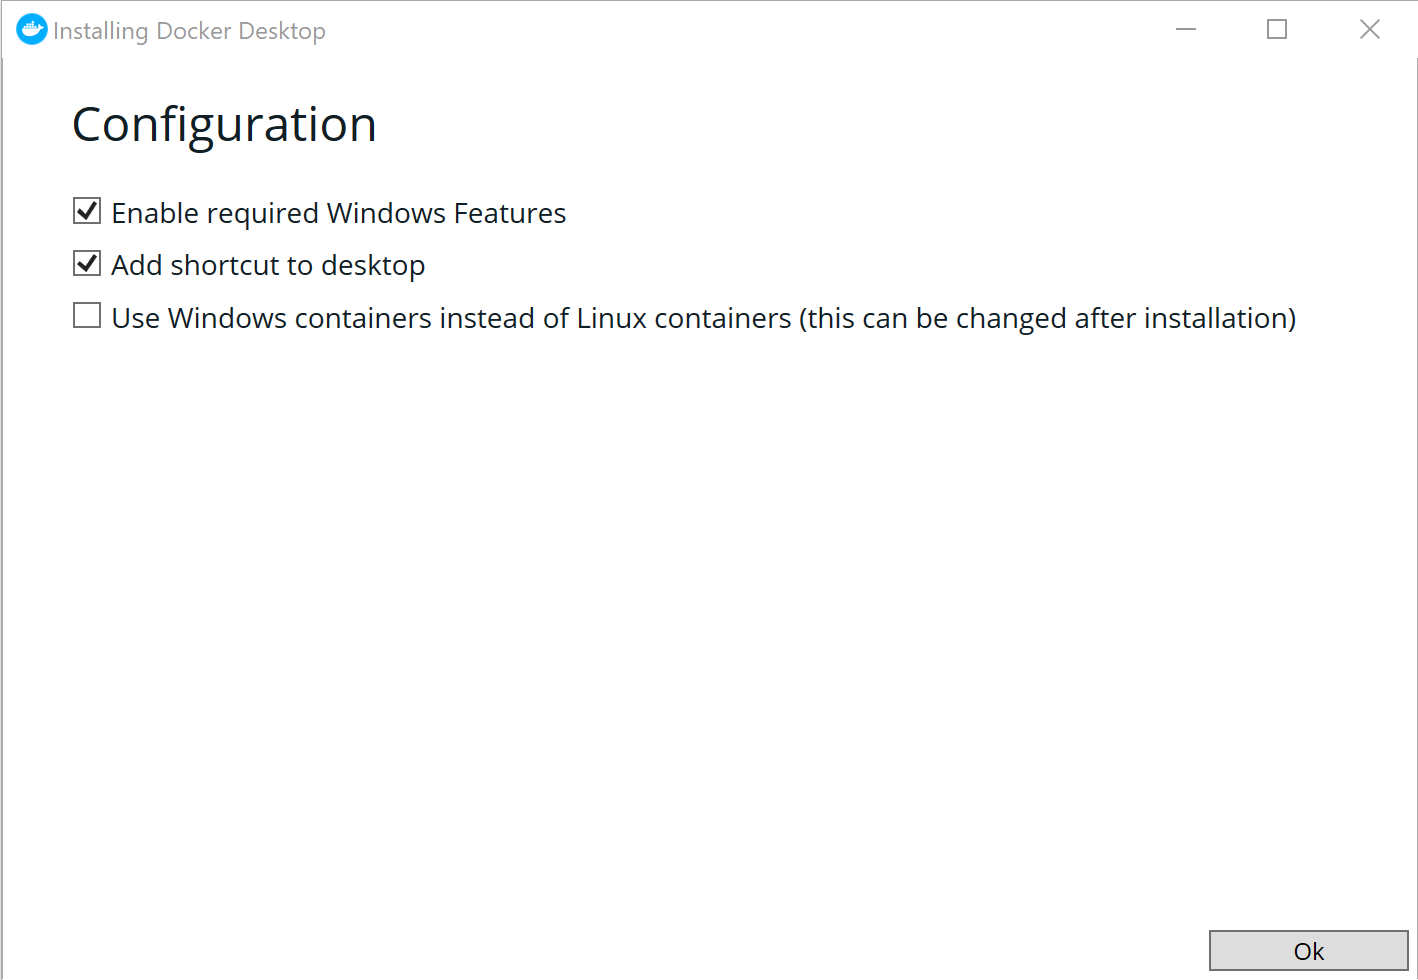
Install Docker, keeping “enable required Windows Features” selected as Docker needs Microsoft Hyper-V which is not enabled by default.
Avoid clicking the “Use Windows Containers” option. Pi-hole will require Linux containers which is the default.
Step 3 - Configure Docker
When docker is installed the first thing you will need to do is sign in. Docker lives in the task bar notification area.
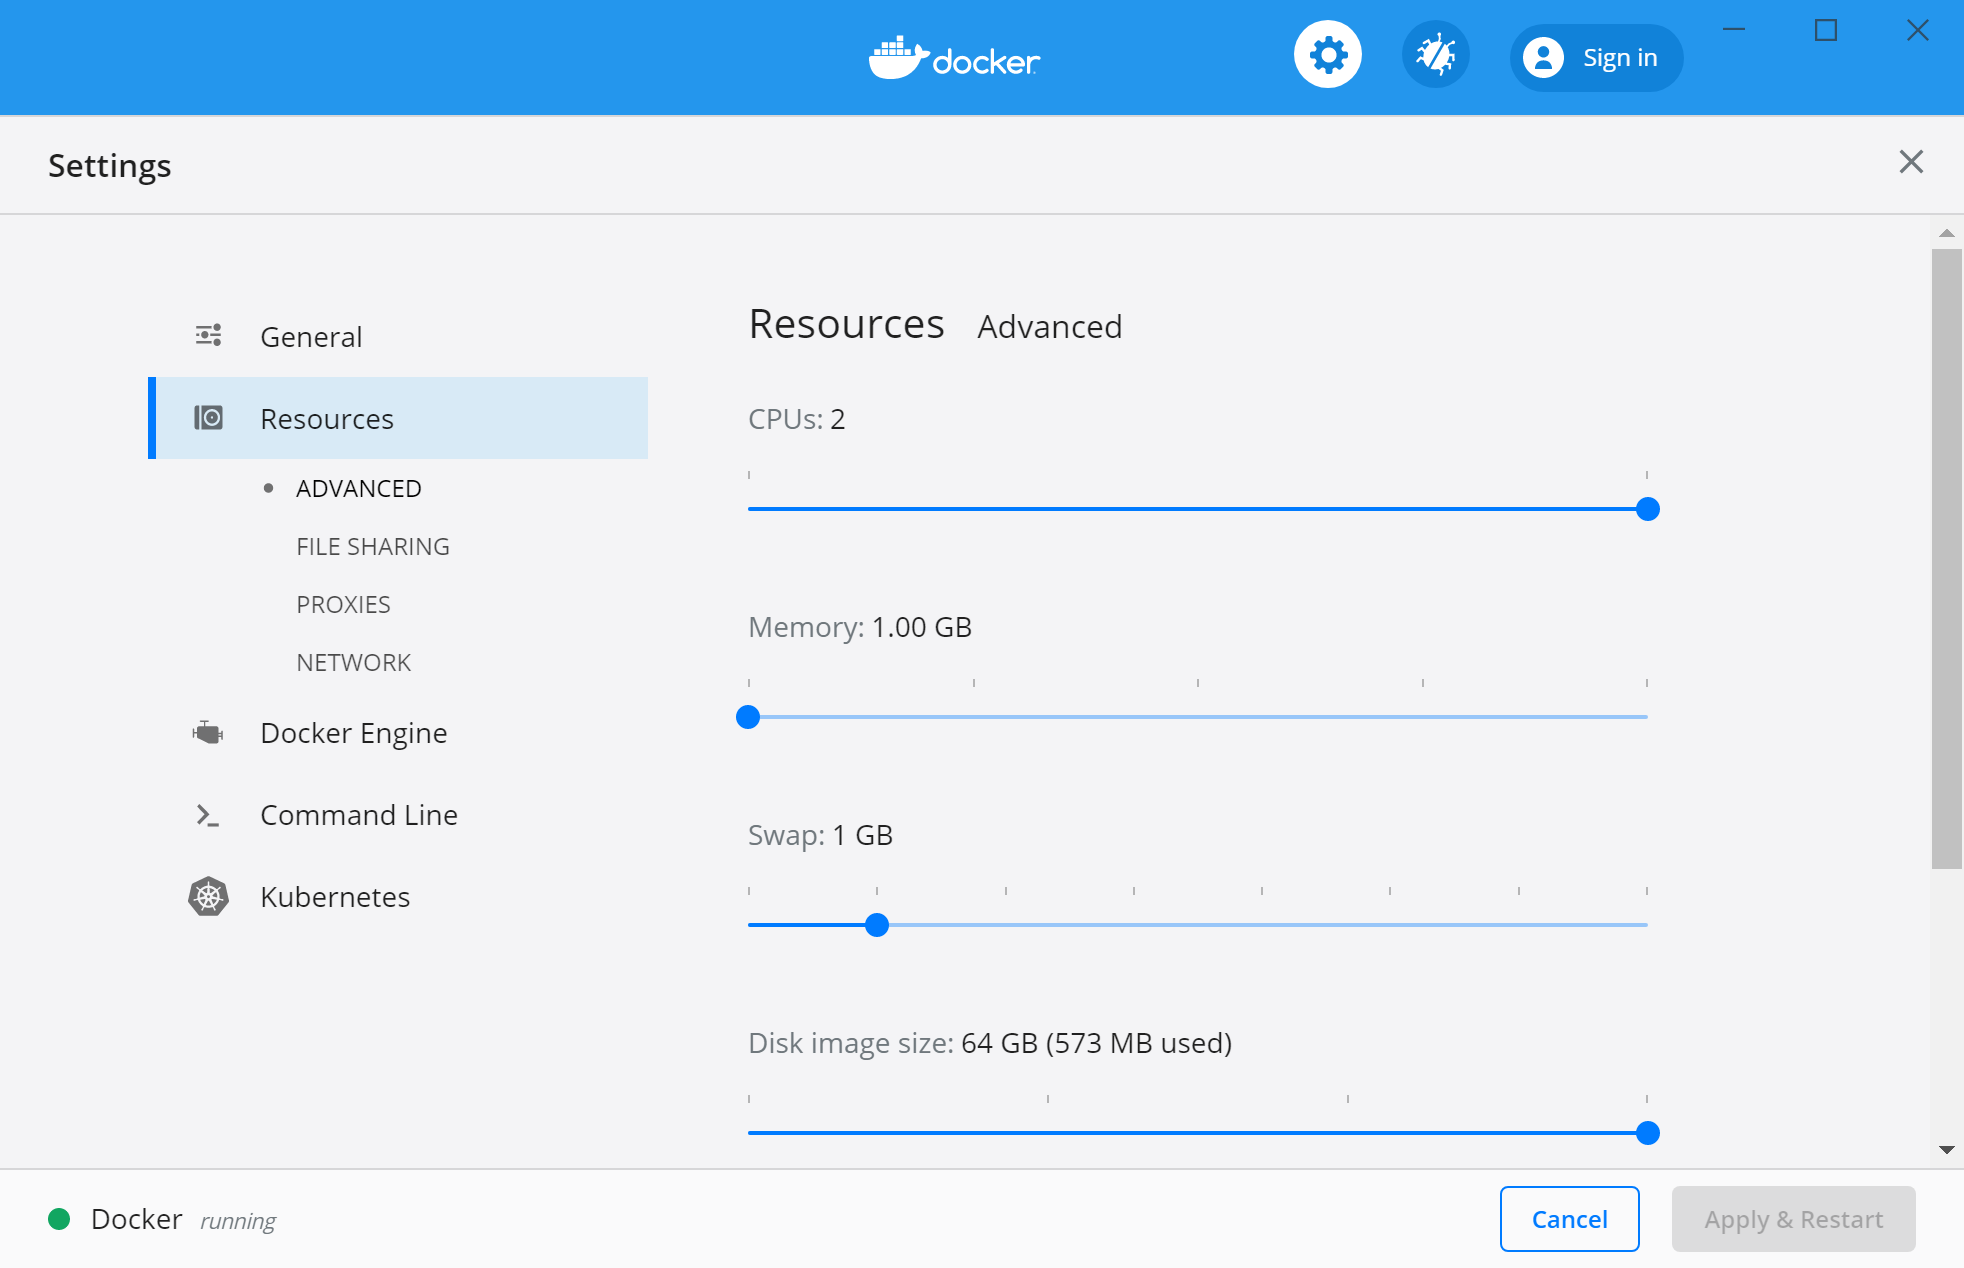
After signing in I recommend tweaking some settings in Docker. You can access docker settings from the docker menu in the task bar tray. I reduced the available Memory to 1GB. Pi-hole doesn’t actually need 2GB, so reducing it to 1GB frees up more memory for your PC. Click ‘Apply and restart’.
 Update June 2020 - If you don’t see these options, just skip to step 4. Docker is releasing a new version with a technology called WSL 2. This is a new way of emulating Linux within Windows and replaces the existing Hyper-V setup. The main advantage is that WSL 2 uses less resources and dynamically uses memory instead of preassigning a chunk of your PC’s memory. This means there is now nothing to configure. You can read more about it on the Docker website.
Step 4 - Download Pi-hole
To download the Pi-hole container, open Windows Command Prompt as an administrator and type the following command: docker pull pihole/pihole
Step 5 - Give your PC a static IP address
Next, let’s ensure our PC has a static IP address. This will ensure other devices can always reach your Pi-hole server without any issues. To do this:
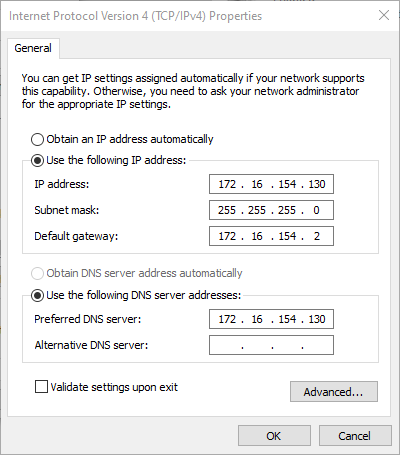
- Navigate to Start menu > Settings > Network and internet > Network and Sharing Center > Change adapter settings > Right click on your active network connection and click Properties. Double click on Internet Protocol Version 4 (TCP/IPv4) and select Use the following IP address.
- Set a manual IP address. If you are unsure what to use for the subnet mask or default gateway, type
ipconfigin the command prompt and reuse the same values for the IP address. - I recommend increasing the last number of your IP address by 50 or so to make IP address conflicts less likely on your network. For example, if your IP address was 192.168.0.5 try 192.168.0.55.
- For DNS settings, use the IP address of your machine you have just set and for an alternative use
1.1.1.1.(this is Cloudflare’s DNS service).
Step 6 - create a customized Docker command
Now Docker is running and Pi-hole is downloaded we can configure and start it. You will need to customise your script. Here’s a base:
docker run -d --name pihole -e ServerIP=172.16.154.130 -e WEBPASSWORD=password -e TZ=Europe/Copenhagen -e DNS1=127.17.0.1 -e DNS2=1.1.1.1 -e DNS3=1.0.0.1 -p 80:80 -p 53:53/tcp -p 53:53/udp -p 443:443 --restart=unless-stopped pihole/pihole:latest
You will need to replace:
ServerIPwith your IP addressWEBPASSWORDwith a password of your choosing (you’ll use this to access Pi-hole’s settings)TZ=this is optional. You can specify your timezone in the TZ format
Note: DNS1 needs to be left as 127.17.0.1 in order for Pi-hole to work. If you’re curious, 127.17.0.1 is the IP address for Localhost (or in other words this computer). You can change DNS2 and DNS3 to whatever you like.
The base script above will get you up and running, however if you want to customise how Pi-hole works, there are a number of variables you can set as part of this script.
You’ll also find more information and documentation on the Docker Pi-hole Docker Github page.
Step 7 - run your script and start your Pi-hole server
Open command prompt as an administrator again and paste in your customised command and press enter. This will create your Pi-hole Docker container and run it.
Step 8 - Check Pi-hole is up and running
Go to your web browser and type - http://127.17.0.1/admin/ or http://localhost/admin/ you should see the Pi-hole admin console. This means you’re up and running!
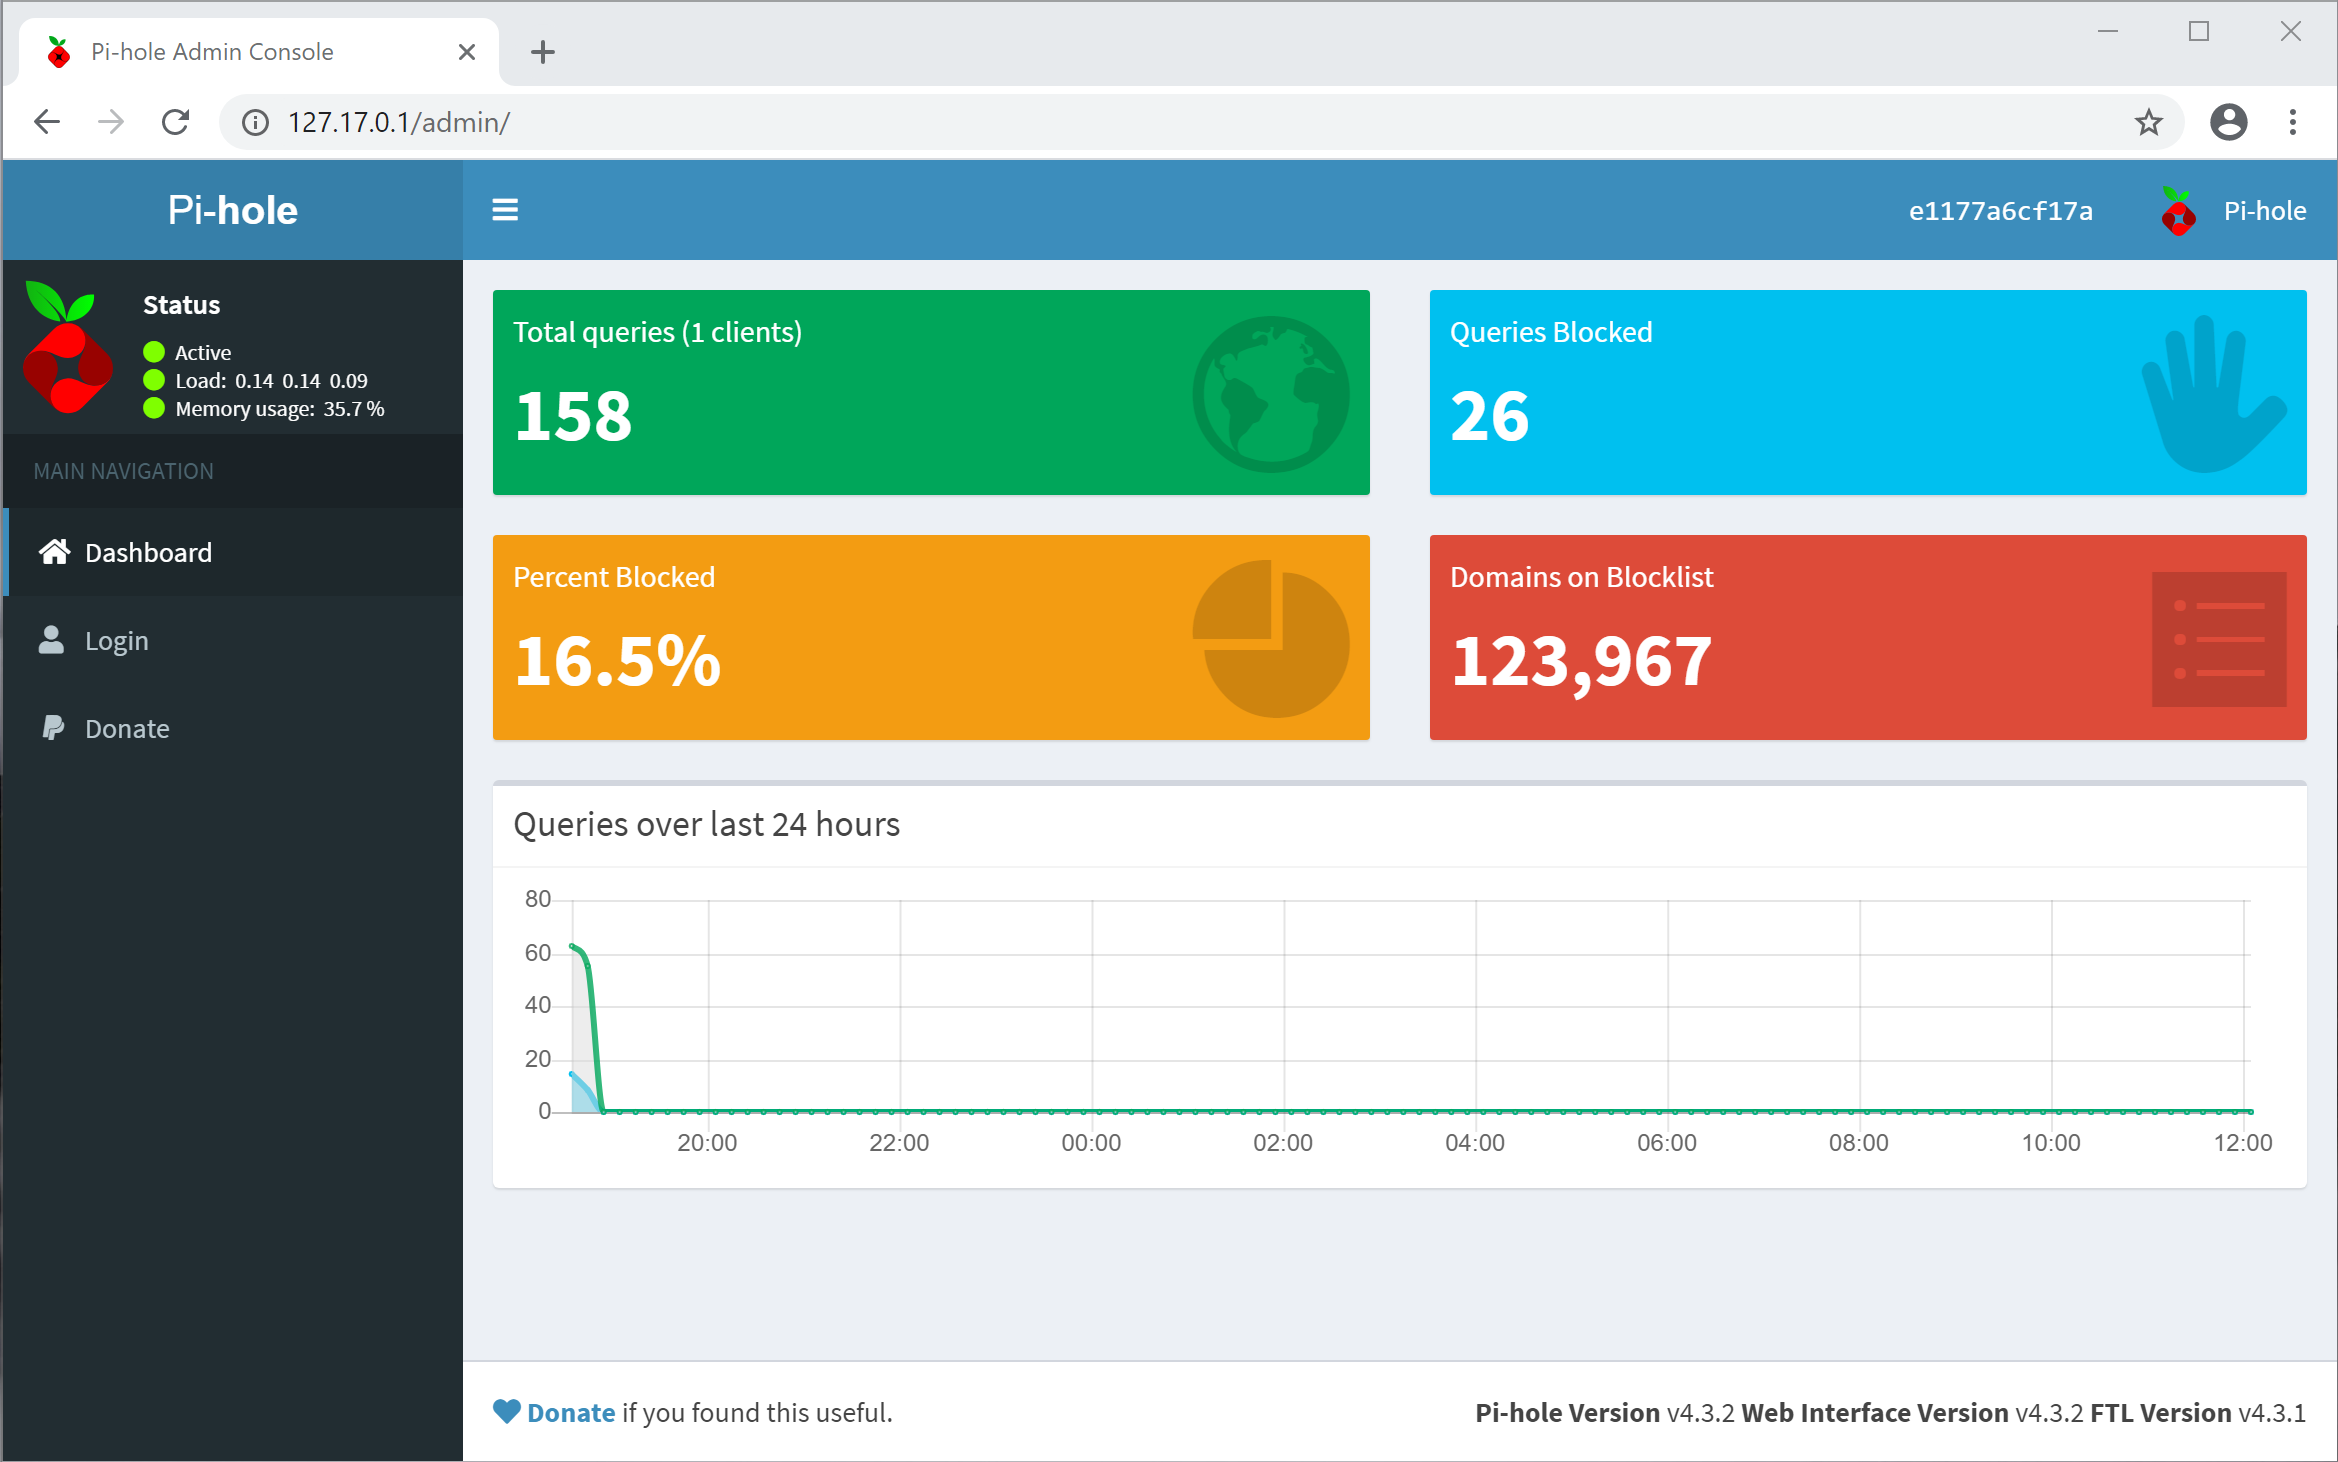
The Pi-hole admin console lets you configure the advanced settings of Pi-hole, see which domains have been blocked as well as blacklisting or whitelisting new domains.
Step 9 - Configure your router
The final step is to change the DNS server on your router to point to your PC. In my case this is 172.16.154.130. This will ensure all of the devices on your network get Pi-hole’s ad blocking magic.
Congratulations! At this point, provided everything has worked you should have an ad-free home!
FAQs
When I shared this post on Reddit I got lots of really useful feedback and questions, so I’ve put together a short FAQ section:
Does the PC have to be connected via an ethernet connection?
At first I thought this would be a problem, but apparently not. My setup works really well over WiFi. Because of where my PC is located in my apartment it’s pretty much impossible for it to use a wired connection. Like always ethernet is preferable though.
Can I do this on MacOS?
Yes - you absolutely can. The process is very similar. I’ve tested this on Mac OS Catalina and it works.
Why use Docker and not just a Linux Virtual Machine (VM)?
This could be a whole article, but in a nutshell Docker is easier to set up and maintain compared to a VM. With a VM you need to ensure your Linux installation is correctly configured and kept up to date. This takes time, and in the case where you encounter a problem, reinstalling everything takes a long time. Whereas using Docker, Pi-hole is kept in an isolated container and Docker takes care of everything else. What’s more all of the configuration settings are kept in your Docker script, so you can easily delete the container and recreate it if you run into problems.
What if the Pi-hole stops working, or I restart my PC?
Restarting your PC is not a problem. By default Docker for Windows is configured to run automatically when you start your PC and the --restart=unless-stopped string in the Docker script I’ve provided means your Pi-hole Docker container will automatically start up. Your internet will also continue to work if your PC is turned off as you can specify a secondary DNS server on your router. In this case your router will simply use this backup DNS server if your Pi-hole is unreachable.
Can I install this on Windows 10 Home Edition?
Not easily. Docker for Windows relies on using Hyper-V, a virtualisation technology only included in Windows 10 Pro or Enterprise. For this reason it’s not straightforward to install Docker on Windows 10 Home. It is technically possible, but it does require you to jump through a lot of hoops. Mark Cameron wrote a guide on Installing Docker on Windows 10 Home which might help.
How to update Pi-hole on Docker
Occasionally you will notice in the Pi-hole admin interface that a new version is available.
With Docker you don’t update the installed version of Pi-hole, but rather delete it and reinstall it with the variables you created in your customized docker command. This is essentially has the same effect as upgrading, but ensures you have a clean, new environment each time.
In order to do this, head to the ‘Docker dashboard’. You can access the dashboard from the docker menu in the Windows notification tray. Once you’re in the Docker dashboard, click the delete icon next to your Pi-hole container. This will stop and delete the docker container.
The next step is to head to an elevated Command Prompt and type:
docker image prune -a
This command clears out the Docker cache and all unused images (i.e. the out of date version of Pi-hole).
Once this has completed, you can reinstall Pi-hole using the instructions in this article.
Essentially all you have to do is run docker pull pihole/pihole in the Command Prompt, and when it has completed downloading, run your customized docker command to restore your Pi-hole instance. Congratulations, you should now be running the latest version of Pi-hole!
What is this set-up like to use on a daily basis?
See my follow up post where I share my experiences after four months Review: living with Pi-hole on Windows 10.
Pi-hole keeps crashing - what’s going on? (updated June 2020)
In the latest version of Pi-hole (version 5.0) there is a bug which can cause Pi-hole to crash meaning you’re left without an ad-blocker or DNS server. I haven’t run into this myself, and I’m running Pi-hole 5.0 on Docker with no problems. However, if you do have problems Angel-Panda Diaz has helpfully shared a workaround which may prevent this problem. This workaround increases the size of the Docker container’s shared memory (SHM) to 5 gigabytes. I haven’t attempted this workaround myself, but let me know if it helps!
If you’re experiencing crashing, try the following script:
docker run -d --name pihole -e ServerIP=172.16.154.130 -e WEBPASSWORD=password -e TZ=Europe/Copenhagen -e DNS1=127.17.0.1 -e DNS2=1.1.1.1 -e DNS3=1.0.0.1 -p 80:80 -p 53:53/tcp -p 53:53/udp -p 443:443 --shm-size="5g" --restart=unless-stopped pihole/pihole:latest
I’ll update this post when this bug is fixed.
Leave a reply